|

|
| |
"Often one plans and
builds something
that later shows itself to be less interesting or of less
value than originally anticipated.
Occasionally the reverse is true: the product proves
better than hoped for."
(John Allen, Model Railroader, November 1972)
|
| |
| |
|
| |
|
| |
I - PLANNING THE LAYOUT
|
| |
| |
| Many wise railway modellers
will tell you that the most important stage of building a
layout is planning it properly - and they are right. In
the case of Little Bazeley, I had the huge advantage of
knowing exactly what I wanted (an Inglenook Sidings shunting puzzle) as well as having
already built and operated a previous layout based on the
planning concept applied: Little Bazeley Mk1. |
| |
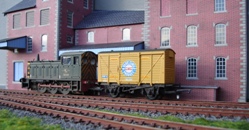
| Built in
2004 as a simple, self-contained and
straightforward 1'x4' (30x120cm) Inglenook
Sidings shunting puzzle, the original Little
Bazeley layout was still providing fun and
reliable operation. I did, however, feel like I
could do with some change after all these years,
and so I began to mull things over for some time
before Little Bazeley was decommissioned and
dismantled in September 2021. In essence I felt like going for a
slightly larger layout, though it would still
have to be easy to handle, quick to set up and
take down again, and convenient to store - all
given my lack of exclusively designated
"model railway space".
|
|
 |
|
| |
| Little
Bazeley was fully portable and could be handled by one
person, but it still took some manoeuvering through doors
and up and down stairs. So ideally what I really wanted
was a larger layout, but one that was smaller. |
| |
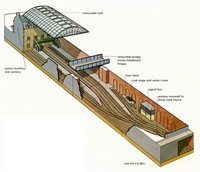
Terry
Allen, "Encyclopedia of Model Railways"
(Octopus, 1979)
|
|
Obviously
that's like trying to pour the proverbial pint
into a quart. There was, however, one approach to
this conundrum that could work - the folding
layout. Not
the one which folds up against a wall but rather
the one which folds back onto itself, thus
conveniently cutting its length in half for
storage purposes. The go-to layout of this type is Cyril
J. Freezer's Minories, a classic design
in its own right. First
published in Railway Modeller in 1957,
it has since been a regular feature in most of
Peco's track planing books such as the Railway Modeller
Book of 60 Plans for Small Locations.
Freezer's
design is an attempt to model, within a minimum
of space, an urban passenger terminus - a setting
which is somewhat linked to the fact that the
trackplan was designed over a two-section folding
baseboard. The hinges required to achieve this
have to be well above "ground level" in
order to allow for enough clearance height for
e.g. buildings - something easily disguised with
retaining walls and bridges.
|
|
| |
| It is
fair to say that Freezer was a
designer, not a builder of
layouts. His Minories folding
layout is considered a classic
because of its concept and
design; Freezer never actually
built a Minories layout. Designed
for a setting focused on urban
passenger services, there was no
reason this couldn't work for a
layout with a seaside freight
only theme. Besides, it really
was the only way to make my
"smaller but larger"
shunting puzzle layout happen.
In
spreading out the Inglenook
Sidings trackplan over the two
segments of the folding layout I
opted for an entirely linear flow
of the track; the plan was to
have the scenery break this up
and provide visual interest. A
contained headshunt track was
supplemented by another stretch
of track which is assumed to be
the connection to the station but
which could be used as a second
headshunt.

It was time to
order some wood and get out a
jigsaw, a drill and some screws.
|
|
|
|
| |
|
| |
|
| |
| |
| The start to any
layout construction is the baseboard (two of them in this
case), and here the golden rule is that nothing you put
on top of it will really and truly work unless the
baseboard you use is built to last, keeps its shape and
provides you with an even surface. |
| |
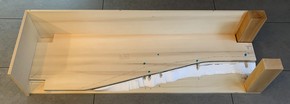
| Since I wanted a
layout framework which would be
solid yet lightweight, I used a
sheet of 10mm poplar plywood as
the base, onto which I glued a
20mm styrofoam insulation board,
which in turn was covered by
another sheet of 10mm ply in
"sandwich style". Once the side-
and backdrop are added, this
results in a very sturdy yet
lightweight layout frame and
basebaord (which also results in
comparatively silent running of
trains).
There is,
however, one major problem with
this approach, and it is really
quite obvious: as there is no
cavity underneath the
trackbed-baseboard and also no
access from below, there is also
no way to run cables underneath
it.
|
|
|
|
|
|
| |
 |
|
As a result, all
electrical connections need to be run
"above ground". It is probably
not as much a problem with a simple track
configuration such as the one I was
intending to use, and it does provide a
neat "enclosed box" when folded
up.
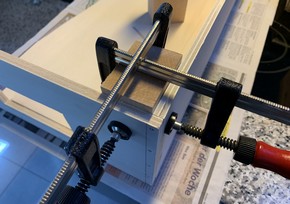
All
in all, the concern given to the
sturdiness of the entire layout structure
is most likely somewhat over the top, but
the idea was to have a folding layout
that would actually withstand frequent
use of its folding feature.
Accordingly,
the corner supports chosen are more than
just a tad on the solid side.
But
since I was also intending to have a
setting similar to a stage front (a
reflection of my appreciation of theatrical
layout design) this was actually also
okay from a visual standpoint.
|
|
|
| |
| Once everything is assembled, a good coat of acrylic
paint seals the baseboard tops, safeguarding the
stability achieved in putting them together. Most if not
all scenic work, including track ballasting, will involve
no small amounts of a mix of water and glue to fix it all
in place (more on this under ballasting, below), and
baseboards that haven't been sealed this way may well
start to warp. |
| |
| |
|
| |
|
| |
| |
| As on the original
Little Bazeley layout, the track used is Peco Streamline
code 100 flextrack, mixed together with a few pieces of
Peco Setrack code 100 "snap track". Apart from
the fact that code 100 track can reliably be used with
older models, it is also very sturdy (a quality more
finescale track may or may not offer). While some
modellers decry code 100 track as "toy like",
careful weathering and ballasting will improve the
visuals to a point where at least I myself am more than
happy with it. |
| |
Other than checking for
clearances, a shunting puzzle layout
requires care in making sure that the
length of individual tracks holds the
required number of rolling stock.
In this case, both the classic 5-3-3 Inglenook
formula as well as the "reduced"
3-2-2 version were measured out,
since I was planning 1980s British Rail
as well as the odd US operating session
(3-2-2) along with BR 1960s and 1970s
(5-3-3).
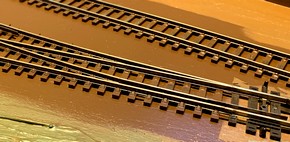
The one
change in comparison to the original
Little Bazeley layout is the switch from
Peco Streamline medium radius
"Electrofrog" points (which
have a "live" frog and require
a certain amount of wiring in order to
change the polarity of the frog according
to how the points are set) to the same
size "Insulfrog" points (which
have an electrically insulated frog and
require no extra wiring to operate).
The
only reason why "Electrofrog"
points were made in the first place was
the bad electrical pickup in older models
and subsequent stalling on electrically
"dead" frogs. But since this is
no real problem with more recent
locomotives and older ones can easily be
improved, the extra wiring required
seemed too much trouble for no real gain
- which is probably also why Peco
introduced the "Unifrog" point
in 2017; out of the package it
will behave like an "Insulfrog"
point but the frog can be made to act
like an "Electrofrog".
|
|
 |
|
|
| |
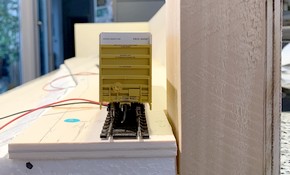
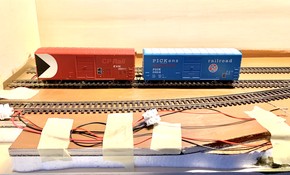
| One potential snag
exists with DCC and "Insulfrog" points: a
potential shorting problem as metal wheels go through the
frog. Even though this only seems to be the case with
wheels on some US models, I decided to play it safe and
add insulator joiners to the inner rails past the frog. |
| |

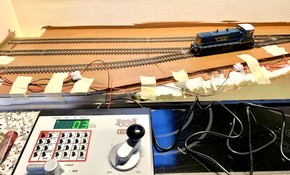
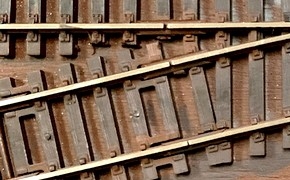
Once everything panned out, the
simple track configuration was laid down
in virtually no time at all using Marklin
Z Scale track pins sparingly.
|
|
 |
|
|
| |
| A test run then makes
sure that all electrical connections work properly before
the cable runs are tucked away. |
| |
|
|
As
a first step in weathering the tracks, I took the
baseboards outside and sprayed them a dark brown
colour using an aerosol spray can from the DIY
store, masking the point switch sections in order
to avoid conductivity problems. Some modellers
let the paint dry before they wipe the top of the
rails, but I prefer to do it immediately. Once
all is dry, it's then easy to touch up the
masked-off sections, as well as any others which
might need it, with a fine brush and
rust-coloured acrylic paint. In order to brake up the
uniformity of the colour, I then added a few
touches of RailMatch's "sleeper grime"
(an acrylic paint) to the sleepers. This is a
simple way to achieve a fairly realistic look,
further enhanced once ballasted.
Weathering the
track really is an essential part of recreating
the atmosphere of the real railways. The colours
vary greatly on the prototype, ranging from dark,
almost black, to to a very light rusty brown. In
the end it's both a matter of taste and a
reflection of area and era.
Weathering the
track is, however, best done with a subtle
approach, as too much paint will easily muck up
the pointwork and reduce electrical conductivity
to critical levels. Some test running after this
stage is essential to iron out any bugs before
the next step - adding ballast.
|
|
| |
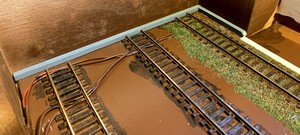
| As hinted at, the
wiring does not stand up to much scrutiny, most likely
reflecting the fact that this is the aspect of the hobby
I enjoy the least. However, since there is no complicated
track configuration, the "spaghetti bowl
approach" to wiring is acceptable to me, even more
so since all the wiring is ultimately camouflaged by a
layer of scenery. |
| |
There is also really no
difference in this case between an
old-fashioned DC wiring approach and a
DCC friendly one, other than the insulator
rail joiners on the inner rails past the
frog of the points, which require
additional feeder tracks.

The sidings section has
additional feeders at the buffer stops
which, given the short length of tracks,
is most likely overkill. All the wiring
follows the common colour coding of
"black is at the back" (and
therefore red wires to the front rails).
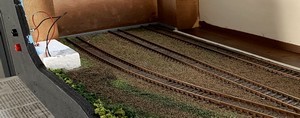
The wires are all hidden
underneath ballast and scenic scatter
material, and run to a central
"access point" on each segment
of the layout where the individual feeds
are joined in a screw terminal to one
outgoing set of black and red wire each.
|
|
|
|
|
| |
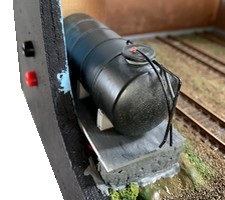
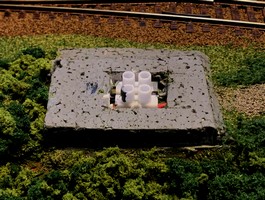
| These access points are enclosed by a base shaped of
styropor which provides a footprint for a scenic element
(a cylindrical tank on the sidings segment that was
rescued from Little Bazeley Mk1, and a
platelayer's hut on the headshunt segment) which both
hide the screw terminal and allow access if need be. |
| |
  |
|
| |
| |
|
| |
IV - BALLASTING THE TRACK
|
| |
| |
| Once the functional
aspects of the track are settled, it's time to add
ballast to the weathered track. And just as with the
track itself, the colours of ballast vary greatly on the
prototype, depending on the type of stone used and how
much soil and rust is deposited on the trackbed by
traffic on the line. Ballasting takes time and concentration and
shouldn't be rushed - which is why I always do it in
segments.
|
| |
I have been using
Woodland Scenics ballast for decades and saw no
reason to change that. Opting for the
"fine" grade dark brown ballast (B71,
which is usually marketed for N scale), I used
highly conventional (and proven) methods for
applying and securing it.
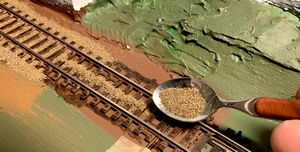
The
ballast is sprinkled in small quantities (you can
always go back for seconds but too much at once
just creates a mess) from a small teaspoon and
then straightened out using my index finger, a
fine paint brush, and a toothpick. Once the
required look is achieved, a mix of water and
white glue (approximately mixed at a 1:1 ratio)
with some added washing up liquid (which helps
to break surface tension and prevent the ballast
from rolling up into clumps) is slowly applied
from a syringe (mine
came as a spare from the vet).
Disturbing the carefully positioned ballast
can further be avoided by applying the mix of
glue, water and washing up liquid close to the
edge of the ballast shoulder. From there it will
be drawn in by its capillary force, i.e. its
ability (thanks to its lower surface tension) to
seep into the dry ballast material by itself.
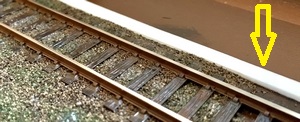
The side of the track running along the
warehouse loading dock was "masked off"
with a foam insulation band, resulting in a neat
and clear-cut edge of the ballasted area,
enabling the loading dock to simply drop in and
fit perfectly (the same technique would be
applied in the case of tracks running along a
platform).
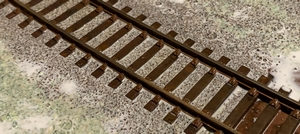
The whole
trackbed should be quite white in appearance and
then left to dry for a good 24 hours. After this,
the ballast will be hard and solid - which is why
it pays to check for dislodged ballast (which can
get onto the ties or cling to the sides of the
rails) while everything is still wet. Also make
sure to repeatedly move point blades during the
drying process.
|
|
|
|
| |
| I did add a small
amount of "weeds" here and there while
ballasting, but overall it is easier and more of a
controlled process to add overgrowth after the actual
ballasting. |
| |
|
| |
V - STRUCTURES
|
| |
| |
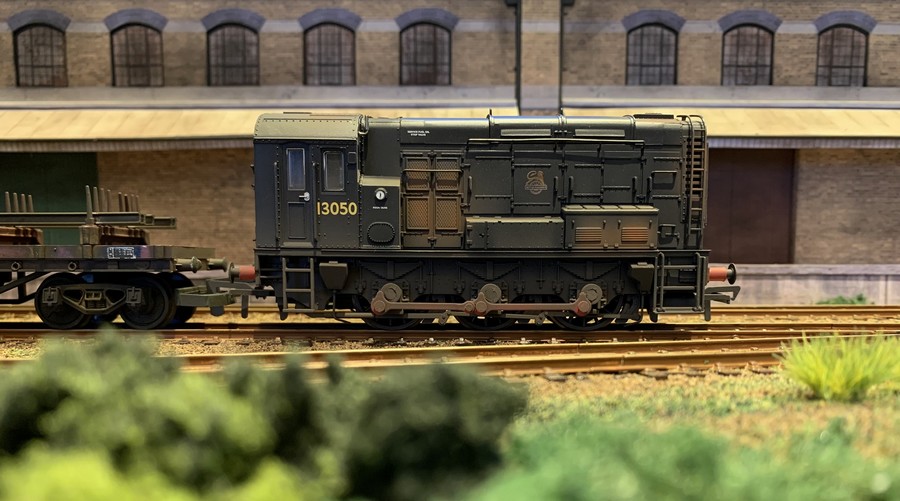
| I had gained some
initial experience with card kits on Little Bazeley Mk1, and I liked the process and
the results so much that I never went back to plastic
kits for structures. My plans for the sidings at Little Bazeley Mk2
were essentially the same as for the original layout: to
create a small and somewhat serene place off the beaten
track but to still have some structures (as opposed to
just a couple of overgrown and windswept tracks in the
middle of nowhere) to visually justify some amount of
freight movements.
|
| |
|
|
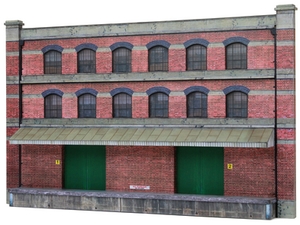
For the first version of Little
Bazeley I had kitbashed the brewery kit from
Metcalfe, but I had been admiring the low-relief
factory kit from Scalescenes long before I started to think
about Little Bazeley Mk2. The look and
feel of this kit was exactly what I wanted, and
after some slight hesitation triggered by a few
doubts regarding my card modelling skills, I
decided to have a shot at building it.
Unlike traditional card kits such as
Superquick and Metcalfe (which contain printed
and die-cut sheets of card and are therefore
practically ready for assembly), Scalescenes kits
come as pdf documents which can be purchased as
downloads and then need to be printed out, glued
onto card, and cut out by the modeller.
|
|
| |
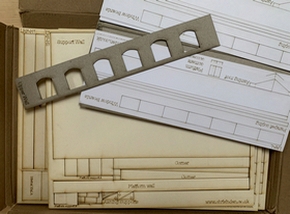
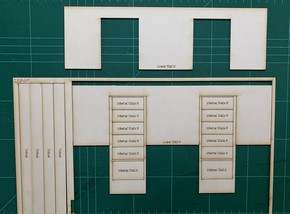
| It was this extra work which initially had me
hesitate, although I found that with a little practice
and diligence it was not as big a challenge as I had
expected. And to make matters even easier, pre-cut card
base layers are now available from ChrisInDen Models for
many Scalescenes kits, including for the T027 low-relief
factory which I used for the warehouse on the layout. With Scalescenes kits you essentially
build layered rectangular shapes and then wrap a texture
"skin" over the top layer of card. This results
in a more realistic, seamless finish; pre-printed die-cut
card kits always show a
groove and the bare card on folded edges.
|
| |
|
| |
The only tools
needed (aside from a printer) are sheets of card in three
different thicknesses, a cutting tool, a steel ruler, a
cutting mat, and either glue or self-adhesive labels. I
used an Xacto knife for the finer cuts and a cheap
snap-blade cutter for the thicker card. Instead of
glueing the texture onto the top layer card I used full
page self-adhesive labels.
|
| |
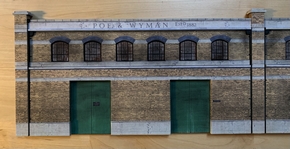
| It is always
a matter of taste, but I found the
Scalescenes factory to have a far
superior and realistic appearance than
any other kit (both card and plastic) I
know of. The textures are beautifully
rendered and less uniform than other
kits, and the sturdiness of the built
model is amazing. As an added bonus
most Scalescenes models are available in
a variety of textures; my choice for this
model was London Brick, one of six
different textures available.
Since Little Bazeley is a folding
layout, the height of the backscene is
somewhat reduced. As a result, the
factory kit would have been too tall, but
leaving off one storey was no problem at
all.
The lack of height was compensated in
width by simply adding a second kit (once
you buy a Scalescenes kit it can be
printed as many times as you require,
which also means you can print out any
part again in case of a mistake).
|
|
|
|
|
| |
 |
|
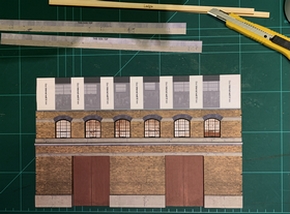
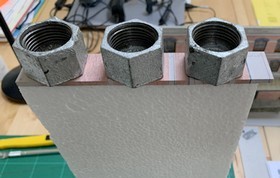
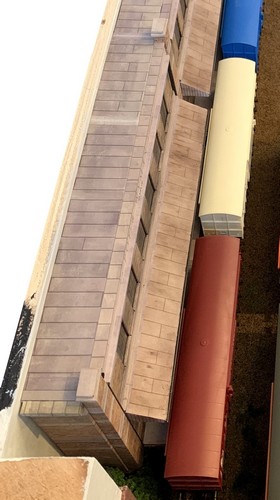
The kit used builds into
a low-relief model, but I wanted some
depth to the building, so I assembled
side walls from scratch and then cut to
size and glued in place a piece of
styrofoam to the back of the kit and
added a roof. Scalescenes offers a
variety of individual texture sheets
which come in handy for this kind of
kit-bashing (the build in progress on the
left is from the first kit I built as a
test, with red brick texture).
|
|
|
 |
|
| |
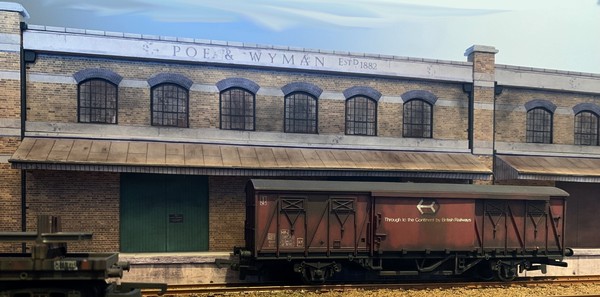
| The London Brick texture already had a lightly
weathered look to it, but I added a little more visual
tear and wear with a light dusting of dark chalk pastel
in places, and then covered the finished structure
off-layout with several light coats of matt spray
varnish. The kit comes with a choice of parapets
featuring different inscriptions; I reworked the plain
stone parapet and added my own company name (a slight nod
to Edgar Allan Poe as well as to Cox & Wyman of
Reading, the latter printing almost all the paperbacks I
read as a teenager in the late 1970s and early 1980s). |
| |
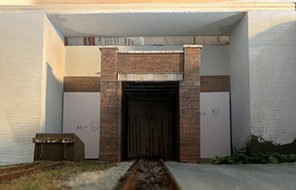
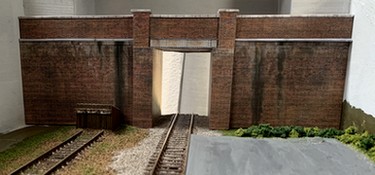
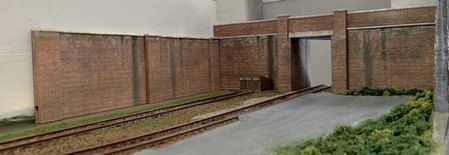
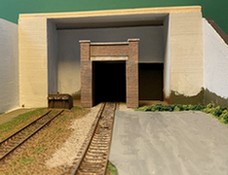
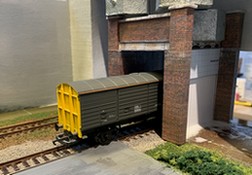
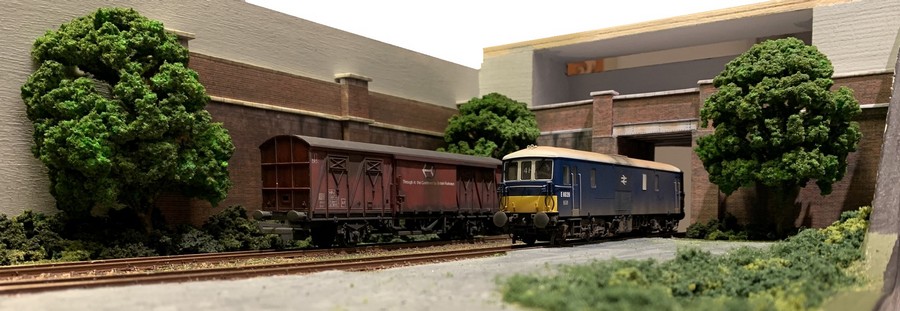
| The right hand segment of the
layout - the "headshunt section" for the
shunting moves - also features one main structure, which
essentially is there to hide the single line of track
disappearing off the layout. Theatrical layout design tells us that tunnels and bridges are
some of the most effective ways to accomplish that.
Looking at the Scalescenes range of kits, I really liked
the plate girder bridge (R012a) and its option to have a
brick parapet instead of steel plates. Going for brown
brick colour here, I decided to build the kit into a
bridge over a very narrow rail passage and scratchbuild
retaining walls to the sides, assuming that this
structure had to be built at the time to safeguard the
railway from a geologically unstable hillside close to
the sea. Beyond the bridge, the single track is imagined
to run into Little Bazeley station. |
| |
|
| |
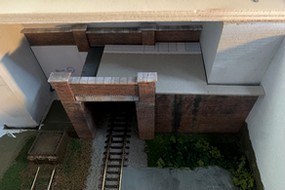
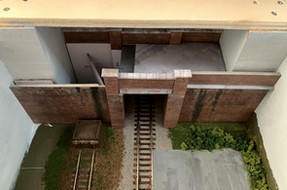
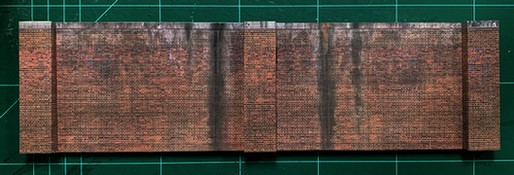
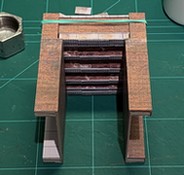
| The retaining walls were a straightfoward build using
weathered brown brick from the girder bridge kit and
coping stones from the factory kit, on a structure built
up from layers of 2mm card. |
| |
|
|
|
| |
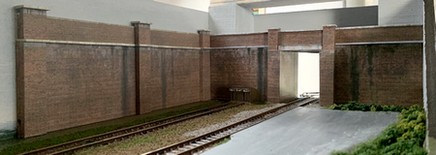
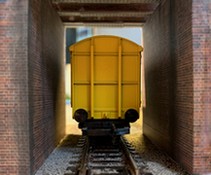
| As can be seen from these pictures, all ballast and
ground cover was put down prior to setting the structure
onto the layout, leaving just enough clear space around
the edges of the footprint of where the bridge and the
retaining walls would go. It is really important - in
order to prevent any warping and/or discouloring - to
seal the surfaces of card kits with several coats of matt
spray varnish before glueing them down and bringing the
scenery right up to them. Adding that scenery gives it
all its final touch, blending the structures into the
landscape rather than having them sitting on top of it.
It also allows you to hide any imperfections in the build
- nothing like a tree or bush to accomplish that.
Scalescenes, by the way, offers
a few free kits to help familiarise yourself with the
basic techniques used to build these card kits. There is
also a very active community on social media, sharing
pictures of their work and providing help and answers on
the Scalescenes facebook group.
|
| |
 |
| |
|
| |
VI - BASIC SCENERY
|
| |
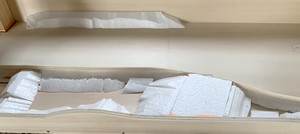
| In terms of chronological order, we are of course now
turning back the clock a bit - in fact to right after the
bare baseboards have been built. Philosophies differ on
this point, but I personally prefer to put down the basic
shapes and contours of the scenery ahead of any
tracklaying. So after measuring out and determining where
the track will go and marking it all down on the
baseboard top, it's landscaping time.
|
| |
|
|
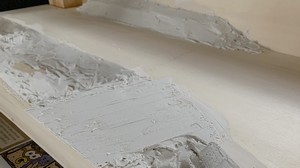
My go to material for this is
expanded polystyrene, also known as styropor,
which has a lower density than extruded
polystyrene (styrofoam) and is a lot
lighter in weight (effectively made up of 98%
air), which also makes it easier to cut and
sculpt with a hot wire tool. Once those
contours are cut and glued in place they are
covered with a coat of plaster of Paris. Once
dry, this is sealed with a liberal application of
acrylic paint.

|
|
| |
| I try to use a colour for this step which corresponds
roughly to the colour of the intended scenic material,
making it easier to blend everything together while also
preventing unwanted "colour flashes" in any
area where the painted contour is not entirely covered by
scenic material. It is at this point that I lay the
track, and once that's been painted too, things are
starting to look like something. |
| |
 |
| |
| The parts where scenic scatter material goes are
painted with diluted white glue, and the material then
applied in layers: first some ground cover, followed by
various bushes. Most of the material used comes from the
Woodland Scenics range and is a wild mix of items
marketed as ground cover, foliage, bushes, and lots more.
I also make sure to mix the colours, in order to avoid an
unnaturally uniform look. |
| |
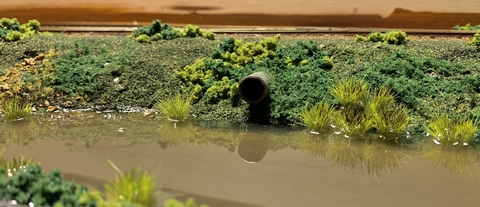
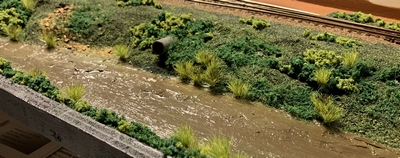
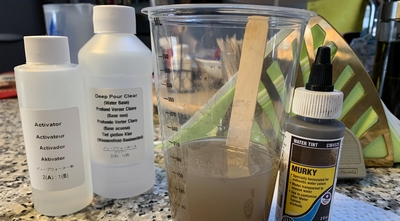
| The left hand
segment features an area of standing
brackish water. I painted the waterbed a
dull murky colour, and - once the scenery
along the edge of the water area was in
place - used Woodland Scenics Deep
Pour Water, which is a two-component
product with a base and an activator. During
the mixing process, I added Woodland's
"murky" water tint, and then
poured the mixture, approximately half an
inch (1.3 cm) deep, into the waterbed.
The two-component mix looks and behaves
likes resin and is completely dry and set
after 24 hours.
|
|
|
|
|
| |
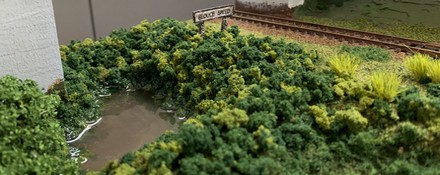
| The tone of the basic scenery on the right hand
segment is that of a fairly overgrown and slightly
undulating landscape, |
| |
 |
|
Apart from a very small
water area the left hand side of this
segment it is characterized by a lot of
low bushes, brambles and undergrowth
(again achieved by mixing material,
mostly from the Woodland Scenics range,
with wild abandon). The character
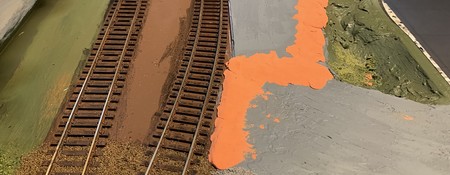
changes on the central and right hand
part of the headshunt segment, with a
tarmac road leading to a hardstanding
(for the transfer of goods from rail to
road vehicules and vice versa) and the
retaining walls and the bridge over the
track leading onto Little Bazeley
station.
|
|
|
| |
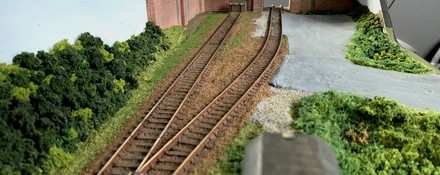
| The road was presculpted from plaster during the
initial contour work of the scenery, while the
hardstanding is built up from sheets of plasticard; the
edges are then smoothed out with air-dry modelling clay. |
| |
|
| |
|
| |
|
| |
| By being
"gameboards", shunting puzzle layouts really
don't require any scenicking at all - although very few
railway modellers will, of course, be able to do
completely without any scenery at all. It is, after all,
much more pleasing to the eye, and if shunting puzzle
critics point out that their operation has nothing to do
with real railways, then at least the visuals can display
some of that atmosphere. |
| |
 |
| |
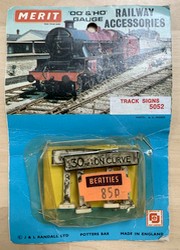
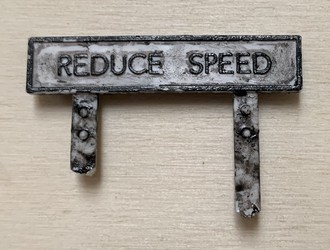
| Sometimes, railway modelling has more to do with
nostalgia than anything else, and the "Reduce
Speed" sign is definitely a point in case. This
plastic injection sign came from a pack of three I bought
in the mid-1980s from Beatties in London. |
| |
  |
|
Marketed at the time by
Merit, those signs have a pedigree
reaching back to the Tria-ang days, and I
distinctly remember having one of their
"Whistle" signs. That sign
was actually missing from this pack,
since I had used it on one of my 1980s
layouts. I was slowly getting into what I
thought to be "weathering" back
then, and the two remaining signs in the
pack display my attempts from those days.
Which is also why, at least for the
moment, I refrained from adding some more
convincing weathering.
And of course the price sticker has a
certain whiff of nostalgia too. Beatties
have not only long gone from High Holborn
in London, but vanished for good.
|
|
|
| |
| Amazingly enough, those very same signs can still be
found today (distributed by Peco) and are still made in
England. |
| |
| |
 |
| |
| A layout depicting a seaside location will not
usually need a lot of trees, given the more or less
constant winds blowing in and hindering the growth of
large vegetation. But since the sidings and station at
Little Bazeley are imagined to be in something of a
cutting, strengthened by some brick walls, a few trees
seemed admissible (since they area also great props, in Theatrical layout design parlance, to break up straight viewing
lines). |
| |
| The trees are
from a range that can generally be termed
"cheap model trees from China sold
on eBay". They are somewhat infamous
for their overall identical appearance
(which of course explains the cheap
price) but also rather popular, since it
is fairly easy to improve their looks. Usually
the excuse for giving these a go is the
sheer number of trees needed and the cost
involved if that forest were to be built
with better material. In the case of
Little Bazeley, I just happened to have
these lying around after a curiosity
purchase.
|
|
  |
|
|
| |
| The ones I had on hand actually didn't look that bad
"as is", but cutting down and painting the bark
and then soaking the existing foliage with spray glue and
sprinkling Woodland Scenics "blended turf / green
blend" on did make them look more like individual
trees and somewhat hides their origins. |
| |
| |
 |
| |
| Buffer stops are an important feature of railway
sidings - and a great modelling item that can be used to
help support the overall atmosphere of a layout. In the
case of Little Bazeley, the buffer stops are somewhat
worn and overgrown, which translates into "been here
a while". There is plenty of variation in terms of
area and era when it comes to buffer stops, but the most
common British type is built using pieces of rails.
It is offered by numerous model manufacturers and thus
also the type of buffer stop most frequently seen on
layouts.
|
| |
  |
|
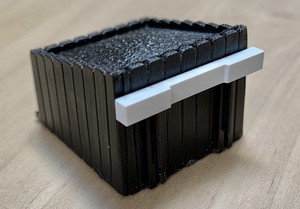
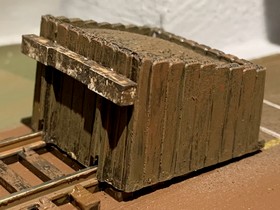
The sleeper-built buffer
stop is a much older type of construction
to prevent rolling stock from running off
the rails at the end of a siding. It
seems to have originated with the Great
Western in the 1850s - and is therefore
singularly unprototypical for a Southern
Region branch in Sussex. But since Little
Bazeley is a reflection of personal
preferences more than anything else, all
of the layout's four buffer stops are
Peco ST-270 sleeper-built ones. |
|
|
| |
| The article number prefix indicates it's from the
setrack range, which explains why it is moulded in one
piece (the white beam is detachable). Maybe somewhat less
sophisticated than Peco's SL-41 sleeper-built buffer stop
(which is a kit), it is a nifty little accessory which
can easily be turned into something a little more
convincing. |
| |
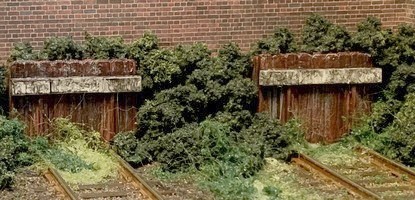
| Two
or three layers of brown, black
and sleeper grime paint applied
by dry-brushing (where most of
the paint is wiped off the brush
before using it, producing thin
streaks of paint that don't cover
up all of what's already there)
are all it takes to make the
buffer stop look worn and used. I
had first experimented with
Peco's sleeper-built buffer stops
on a module I built in 2020 to
test out a few things (seen to
the right here) before starting
out on Little Bazeley Mk2, where
the "buffer stop
situation" turned out to be
a little different.
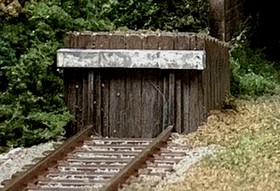
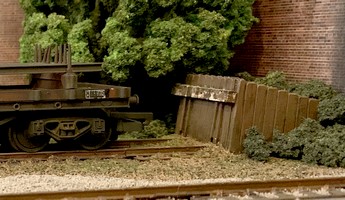
At the end of the headshunt,
on the right hand segment of the
layout, I placed a sleeper-built
buffer stop the usual way; after
some basic weathering and once
the adjacent wall segments were
in place, I added the usual wild
mix of scenic material.
|
|
 |
|
|
|
| |
   |
| |
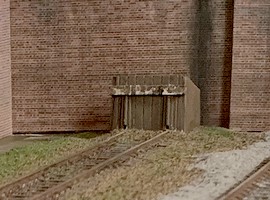
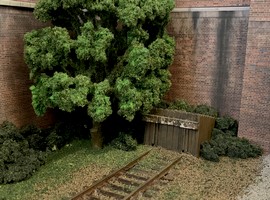
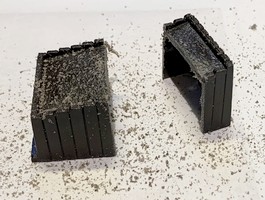
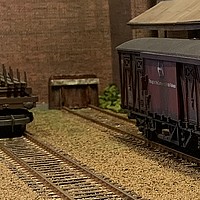
| At the end of the sidings on the left hand segment,
however, I found that putting down the buffer stops in
their original size would take away too much from the
length of the tracks - a critical factor with a shunting
puzzle. Given that I had a wall in place, I simply cut
down the buffer stops to size. Quite a bit. |
| |
|
| |
| Adding bushes and brambles growing up around the
buffer stops helps to disguise just how shallow they now
are. |
| |
| |


